Showing posts with label Crafty. Show all posts

Thursday, July 4

Wednesday, July 3

Make It - Mend It: Easy Peasy Boho Bead Necklace

Happy Wednesday my loves! Here's a wee tutorial on making(or re-making) a boho knotted-bead necklace... the knots help to keep the beads in good shape(not rubbing off against each other), and if it breaks when someone small is chewing on it, only one bead will come off, so there is less general chaos and danger! I've never stopped wearing jewellery when I've had littlies, I think there is something so beautiful about their little fingers exploring the different colours and textures, and their little eyes lighting up as they spot their favourite bead or button. FR(9 months now!) is at that lovely stage of coming into my arms for a cuddle, then glancing up to my ear to check which earring I am wearing... and then peering round the other side to eye up and fondle the matching earring. Oh the cute! I've always found that if you keep wearing jewellery and encouraging them to touch it gently, they will learn to treat fragile things with respect. So, without further ado, the necklace.

1) You need some of your favourite beads. For me, a necklace I made years ago that was ABOUT to break.

I just love the colours so much, I was desperate to preserve the 'feeling' of the necklace, while also re-stringing it and making it much longer. Don't be afraid to cut up or otherwise destroy something you've bought in a shop or been given, in order to extract the pieces you love the most.

2). You need a necklace, or picture of a necklace that you want to model your new necklace on.

I made this blue strand out of a combination of several different necklaces last year, and I want to use the same method for starting and finishing the necklace; a 'clasp' if you will, although I intend to make this new one long enough to just pull over my head.

3). If you want to make your new necklace longer than the old one, you will need some extra goodies to fill in the spaces. I had this pack of cheap plastic beads with a gold finish, which seemed to fit in(although I don't want this necklace to look all shiny and sparkly, I think the boho look has room for bits of treasure here and there!), as well as some new beads that my parents brought me back from Murano, Italy(again, I was careful not to choose the really glassy, sparkly or metallic options).


You also need thread or cord to string your new necklace on... I always prefer a waxed or otherwise coated cord, which will prolong the life of your necklace.

Make sure your cord is thin enough to go through the holes of the beads you chose, or that the beads have a large enough hole. If they have very narrow openings, you will need to use embroidery thread, but then you will also have to use a needle - and make sure the beads can fit over the needle... yawn! Very tiresome. So I prefer a thin-ish cord and beads with larger holes. Use a large quantity(at least 2m) of cord or thread, as this design knots in between each bead for safety ... you will be surprised how quickly you will go through a couple of metres of cord!

4) Start! You need lots of room - preferably a tray on a table, but I usually do mine on the couch in front of the TV, so I choose one with a big lip so that the beads won't scatter on the couch. Begin by tying a loop - not too big, just large enough to slip over a small bead - into one end of the cord...things will be a bit fiddly at the beginning because you will be looping a long long cord through everything(I had a length of 5 metres which I then cut in half).

Then you're away... just remember to tie a juicy little knot after each bead, or if the bead has a particularly giant opening, knot it several times on the same spot to make a larger 'bulge'. If you'd like to include a button that has 4 holes, criss cross the thread through firmly so that it sits flat against you... does that make sense? I hope so!

I love the combination of sizes, colours and materials, but you may prefer a more uniform look. For this necklace I am 'vaguely' following a pattern of alternating smaller sized beads or buttons with larger sized ones. It can be genuinely difficult to make something that does not have a pattern or repetition to it; because I like the hodge-podge patchwork effect of different kinds and colours of beads, I have to always check that I am not repeating myself!

5) Keep holding it up against yourself to see how long you'd like it to go(or, if you're an organised person, figure that out beforehand and have a measuring tape handy to see when you've hit the middle), and make sure that you are placing things just right. Because I prefer the organic, step-by-step approach rather than planning the whole piece, I have to check when I get to the centre that the bead in that spot is nicely weighted and shaped, and if you are alternating sizes like I am, that it's a larger sized bead. This will help to hang better. Then just keep on going, till you get to the end...

6) To finish off, you want to tie a knot after your last bead as per usual, and then leave a little space(about 5mm) before tying on the bead that you will use to 'clasp' or shut the necklace. After tying the clasp bead on, tie three or four knots directly onto the cord, in that space that you left. Then tie a knot in the flyaway cord, as close to the other knots as possible, and snip the end.

If you like things to look tidy, you could try and thread the flyaway back through the last bead before trimming it, so that it's partially hidden. You're done! Fling it on, and you're away.


Any questions?


Saturday, May 25

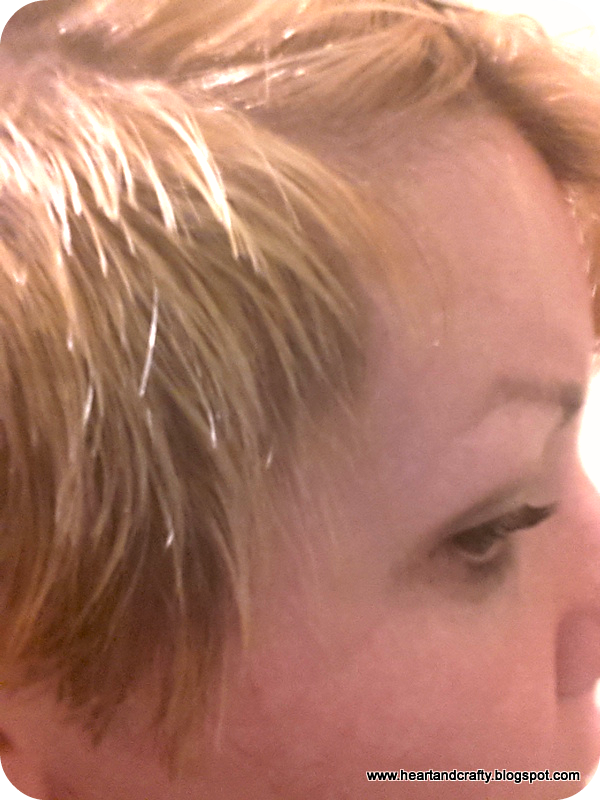
Cut It Out! (the self-made, stingy girls guide to cutting your own hair)

So. I've done it again. I've cut my own hair - and it looks great! In my humble opinion that is... I know I'm going to get lots of funny looks, and I'm going to be fielding lots of questions. I have faith that most of the people who I bump into in the next wee while are used to me and my crazy ways; they'll say it looks fantastic, even if they don't think it. Which is what matters in a friendship(by all means advise a friend against cutting her hair if you need to, before the fact, but after the fact, remember it always looks gorgeous...).
      I know lots of people will again be amazed by the fact that a) I thought I could cut my own hair, b) I had the guts to actually do it, and c) that it turned out how I wanted it to. So I thought I'd give you the lowdown on cutting your own hair, because it really is an easy skill to master(not saying hairdressers aren't skilled, because they mostly are), and it will save you oodles of money, and it feels totally liberating and empowering.
       Here's the key:

oh I'm soooo funny!! Cracking myself up right now....

Your Hair Will Grow Back!!!

That's right friends, the key to being confident enough to cut your own hair, is knowing that truth. The sun will rise, and the sun will set. Your hair will grow back.
Alrighty, armed with that knowledge, you can start your journey to hair happiness by following these steps.

1) The Three R's: Research, Research and Research
Think about it first - that goes without saying. I thought about this particular hairstyle for a YEAR beforehand, but that is unusually forethought-y of me, usually it takes me a couple of weeks to decide what I want to do. Remember, it will grow back. Go on Pinterest(like, now!) and make yourself a profile - if you haven't do it, do it please now!!! You may not know what kind of hairstyle you want, or you may know what it looks like but not the actual name of it. Start by a broad, generalised search, like 'layered hair' or 'short hair' or 'bangs'. Make yourself a 'Hair' board, and start pinning stuff you like. You'll figure out what to search for once you know what kind of style it's named. Does that make sense? I have two hair 'boards', one for long hairstyles, and one for short hairstyles. Basically the long hairstyle one is to inspire me to keep growing my hair(it's taken 18 months to get this long from a pixie cut), and it serves as a test as to whether I really want to cut my hair. And the short hairstyle one is for inspiration and fun! When you are looking for pictures to inspire you, or when you are narrowing down your search, keep the following in mind:
- Face Shape/Body Shape: Be honest about your face shape. Look closely at the pictures you love... is your face heart-shaped and the models face oval? Is your face rounder? Try and find pictures of people with the haircut you want, that have a similar shaped face to you, or even better, someone who looks about the same weight as you! This will make a big difference to how the haircut turns out.
- Angles: See if you can find pictures of different angles of the same or similar haircuts. It's all very well to know what you want the front of your head to look like, but you need to know what the back will look like t0o! Also side-views are helpful; how will the hairstyle look around your ears, face, jawline, neck... If you're going to cut your own hair, you need to know all the different angles. 
- Growth Pattern: Include pictures that are similar to how you want your hair cut, but longer. You need to know how it's going to look as it's growing out. I always leave my hair to grow at least 2 or 3 months in between cuts, mostly out of pure laziness, and I like to know how it's going to change as it grows. 

Some of the pics that are inspiring me

2) Youtube:
Pretty self-explanatory. If you are nervous or uncertain of how to go about cutting hair, look for a video or two on Youtube. I didn't this time round, because what I wanted to do was pretty simple and I've done versions of it before. But I found it really helpful when I was wanting to cut my fringe in the Betty Boop(or Betty Page) style of short, blunt bangs, to watch a few videos - several times - that showed how to cut your own fringe. I searched specifically for 'Betty Boop bangs', so again it's helpful to know what sort of name to give the style you want. You may search seperately for 'soft, feathered fringe' and 'long layers' so that you can put together several different angles.

3) Pin Trial:
Armed with a wall mirror and hand mirror, and a bunch of bobby pins, PIN your hair into something closely resembling the style you want. Curl it up underneath, use rollers, whatever - have several redoes until it looks right. Wear it around the house for a few hours, and catch sight of yourself in the windows and mirrors around the place. See if your kids even notice!! If it looks ok, wear it out to the mall, coffee-group, anywhere. Get used to it. Same philosophy as putting up images of that tattoo you want to get all over the house: get used to it, and decide before it's too late if it's what you want. If it's not quite right, adjust it. It can be helpful to take pictures of your hair pinned up this way, to guide you when you start to cut. 

4) Choose your day - and begin!
Choose a good day and time to do it - when the kids are in bed(otherwise they'll get ideas!) and book it into your diary, just as you would a regular haircut. Don't let it get squeezed out! Make sure you have all the tools you need. I usually have:
- small haircutting scissors($2 shop or Kmart)
- fine tooth comb
- bobby pins or banana-style hair clips
- hair razor if needed
- towel or old shirt - just like dying, a button-down one is best, so that you can gingerly peel it off at the end without pulling a back-load of hair over your neck and face!
DON'T have a glass of wine first... always cut sober, friends! You can cut your hair wet or dry... I usually do mine dry - and not super clean either. It doesn't matter in my experience. Wet hair is harder to clean up afterwards though! Start combing your hair into small, horizontal sections. The nape of your neck is usually a good starting point. Now - I'm not going to go into the nitty gritty here, so for more detail, go to Youtube! I'll explain what I did for my 'undercut'(short-sided) haircut here, but I doubt that it's what any of you folks are pining for! :)
 My hair is in bits!
First I sectioned off the part of my hair that I wanted to cut, and using my fine tooth comb I parted my hair... checking several times with the hand mirror, and the husband, and finally even took a couple of photos of the back of my head with my phone - so handy! I wanted the part to be straight but curved with the shape of my head.

Mmmm... look at that greasy hair... 
 First cut: Always cut at least an inch LONGER than you want your hair to be - by the time you have straightened and trimmed all the edges several times, it will be short enough, trust me. Here, although I wanted to actually shave the partioned side of my hair, I cut it first - as neatly and evenly as possible. When I'm cutting my hair this short I always hold the scissors vertical - in line with the side of my head.   I divide my hair into thin vertical sections using the comb, then pull it out from my head with my fingers and cut up vertically on the outside of my fingers, keeping the scissors right up close to my fingers. When my hair is super short and I'm trying to even things out, I do sometimes cut on the inside of my fingers... if that makes any kind of sense... 

Shaved
Second cut: This haircut was quick because I was only doing one section of my head, but shaving with a razor is definitely a fast way to go! It was quite tricky doing the bit at the top and back, along the parting - I hollered for my poor husband to help, but he was useless! Sorry darling! I was a bit scared about going over the parting, but soon realised it wouldn't actually shave those longer bits that were all carefully pinned down - phew! During the whole process I kept putting down the scissors or razor and checking with the mirror and my phone again. I would spot the areas that needed to be evened out, put my hand up on that part of my head and then put down the mirror/phone and get the scissors out again. You really learn to feel your hair, feel the length of it in relation to the thickness of your fingers... I almost reckon I could cut blindfolded by now! Almost....

Final check-a-roony!
Last step: Smile!!! You look great! Tell yourself that, over and over again! 

Adding some doodly love-hearts definitely helps!

5) Aftercare:
Ok, so not really care of your hair afterwards, but caring for yourself. Your reflection may look odd.. you may not look like yourself any more. It will take some time to get used to the new you. You'll forget when you wake up - go to the bathroom - and ahhhh!!! Who is that? Something that I always try to do when I go out for the first time is really fix myself up nice. You're going to be feeling slightly timid and self-conscious, your friends are going to exclaim, you'll catch sight of some of those nasty shop-window-angles... so dress up! Put make-up on, put your pearls on, wear clothes that are flattering and familiar to you, that you KNOW make you look and feel great. First impressions count - even to yourself about yourself! So make sure you're feeling good when you leave the house with your new do. Put your shoulders back. Smile. Put Adele on in your car so that you can sing as loud as possible! Practice the art of self-confidence.

You're looking damn fine!

Wednesday, April 17

Just a quickie....

Recent developments:

- An abandoned compost bin sits on our front lawn. It was dropped off on the weekend, still smeary with someone else's scraps. When it stops raining, we'll move it away from its Dalek-like sentry position to a more suitable spot. Our rubbish bags remain bulging at the seam, so there's lots more work to be done...

- We have used just under 1 disposable nappy per day in the last month. For the first couple of weeks those were the night nappies, but I've bit the bullet and now the bub's bum is in cloth at night too. Only a couple of leaks so far. The other disposables used have been when she was being looked after by family, while I was away. But I'm SURE I can work on them too... I bet my parents would just LOVE for me to teach them how to use a MCN.

- I want to be a writer. I want to write books and stuff. There, I said it.

- I'm thinking about joining in with the amaaaazing Miriam at Create, Hope, Inspire for 'Me-Made-May', which involves wearing something handmade every day, and making something to wear once a week... I think... the details are still sketchy, but I'm keen!

- Lastly, I was wondering if anyone would be keen for a post on how to make your own cloth nappies? I can link y'all to the websites I use for fabric and patterns, and add all my own tips and know-how(a rather short paragraph) as well as my tips for using cloth nappies effectively - NO LEAKS! (Hint: it's not them, it's you..)

That is all.


Loving Christchurch

I've been putting off this blog post, because I don't know where to start. Should I start at the beginning, when we got to the airport and I went to check in and realised I'd left my wallet at home? Should I write a tribute to the kindness of strangers, of money loaning and coffee buying and the strange feeling of being comforted and reassured by the presence of people I'd never met before? Should I instead talk about how inspired I am to take this blog to the next level, to make it more professional and aim for the stars - to actually believe that I could earn money one day from writing? I have no idea, and as you can tell, I can't even begin to put my thoughts down in a logical, readable way. So here instead are some photos.
I met so many amazing people, here are just a few:
(I was really worried about being in photos, and felt really yucky all weekend about all the photos of me appearing everywhere... but I worked hard on the last day to be brave and take some pics, and I'm so glad... and a bit sorry that I didn't get more pictures with people!)

My badge, made by the beautiful and hilarious Holly, bloggers on plane(like snakes on a plane), the room that I shared with Simone,
Bloggers panel, gorgeous embroidered name badge, bloggers snapping away,
AMAZING goodie bag, bloggers on a rooftop, bloggers bunting

Christchurch. There are no words. A strange juxtaposition of ruins and hope. The city looked wartorn, but felt fresh, new and hopeful. 

I really really want to write more, but I don't really know how. So that will have to do. This week I will hopefully update y'all on my mission to reduce our rubbish, homeschooling and some other stuff. Maybe some reviews of our favourite Japanese anime kids films? A list and description of my favourite new blogs? We'll see how the spirit moves me.... :P

Monday, April 8

Orange Peels and Eggshells

Sooo this post on composting has been very delayed, and is not even really a post on composting at all! It's more of a place-holder. These are the things I have done on the composting front:
- well, used more food, and made more food scraps.... so IF I was composting, we'd be, ya know, turning the soil and stuff. Or whatever it is that composters do.
- I got out a couple of books from the library - children's books, no less, with titles like 'Where do my Food Scraps go?'. I thought that the children's section would be a better place to start, what with my complete LACK of knowledge about this subject... and when I've glanced at 'grown-up' books on this topic and other garden-related subjects, it's all claimed to be easy to do yourself, but then it explains the process in very gardener-y language... not helpful!! But unfortunately, these children's books were not much more helpful. They informed me that composting is, indeed, a thing you can do with your food scraps. Insert full-colour snapshot of someone's rubbish heap. Sooooo helpful. There was a children's book, according to the librarian, on how to make your own composting system, but it was out. So that was that(my library clumsiness, and inability to use public facilities that any child could access would make for a whole OTHER post....).
- I asked a few people I know some questions. But picked bad times for both of them! Sorry peeps! No info to be had there....
- I looked at my yard. Hard. I looked at my yard hard. Picked a good spot. Why this spot? For some reason I naturally toss dead flowers in one particular spot. However, I may need to change my location, because, as my F-I-L reminded me, rats. So yeah, apparently as FAR from where humans live as possible.
- I researched a few different composters,  online and at the garden shops. They're all pretty pricey, as far as I can see... I was going to try and review some, but really, my heart's obviously not in it.
- I was then offered a free, un-used composter from my parents-in-law, who are moving house soon. They use a worm farm now, and love it.
-  I said yes.
- RE worm farms, we had one. We made too many scraps for our measly 1000 tiger worms. And then, it blew over in a storm, and they all got away, the sods! 'Never trust an animal you can't train', as They say. Or something.
This is as far as I have got with this mission to reduce waste and reuse organic matter. The parents-in-law will deliver the composter sometime next week, and then, maybe, I can ask them how the heck I can use it/!?! Who knows.
Stay tuned for more in my mission to save the planet. Coming up(hopefully, sick bubba allowing), how I threw a party for my 5 yr old and had hardly any rubbish afterwards, and my ideas on reducing our use of packaging. Hooray! Also, this week(the posts will be flying thick and fast), a couple of exciting product reviews and the such like. Double hooray!
bye now

PS I used a cloth nappy overnight. It didn't leak, and in the morning I popped it into a bucket of cold water and ran quickly back before all the lethal gases could leak out and burn my eyeballs. I will have to go back and address it sooner or later!

Saturday, March 16

Finally, achieved something!!!

Well I have finally finished my latest set of pieces for The Crafty Buffalo(my shop on Felt)! I am so excited and feel like I'm finally back in the saddle... craft markets here I come! Here's a sneak peek of some of my favourites....

PS.... if you go to my shop and like what you see...


And want to make a wee purchase from mee....
(can't rhyme any more)
Then leave a comment on this post, with your Felt username, and you'll recieve TWENTY PERCENT OFF your purchase...
20 %
Whaddya think? Keen?

PPS: also add a convo reminding me that you have this AMAZING DISCOUNT because you followed the link from my blog to my shop. Because, you know, mummy brains. Can't say I didn't warn you.


Thursday, February 28

Crafty Thursday

When maddy got dressed this morning, she was head-to-toe in mummy-made clothing(no I didn't have the physical or emotional stamina required to get her to school). I felt a bit inspired. Made her another skirt. Finished off my new batch of earrings and pendants. Played around with some ideas for new dummy chains. Made a little baby bracelet, just because. My day went from shitty to crafty. And now Grand Designs is on the telly. Perfect! What have you been up to today?
Xo

Thursday, January 10

The Best of The Interwebs

    I thought I'd better follow that depressing post with a fun one ASAP, because you are no-doubt feeling slightly more glum than you were before, so here you go, an impromptu round-up of things that are making me laugh today, Thursday the 10th of January. Not all necessarily new and hot-off-the-press, but altogether awesome and worth sharing.

Cats:
cat
24 reasons we ALL love cats: I could watch this again and again. How are cats so awesome and stupid all in one? How?

Recycling:
How to Make Continuous T-Shirt Yarn  by:-jessicabarst
Are you wondering what to do with those crappy old t-shirts you FINALLY snuck out of your husbands drawers? Can't bring yourself to throw away your ex-girlfriend's tees? This is beautiful and cute and easy, yay!

Microchimerism:
Fetus.
Are you a lady? Did you birth a baby or two out of your bits? Feeling like you could kinda wring their necks right now? This is a slightly creepy and altogether beautiful fact about our children ALWAYS BEING WITH US....

Ladies we love:
male celebs as women 6 Im sorry, but now this is happening (33 Photos)
This. That is all I can say. Just this.

Thrifting:
macklemore
If you have not seen this video, you must, you must. The song is genius, the music video is even better. I need to watch it every day as part of my self-medication. Warning, it's got some swears. But they're good ones.

Hope you have a happy Thursday.

New Year, New Issues

            I'm sorry I'm so irregular with posts! I tells you, I'm constantly thinking up ideas for posts, but do I have the time or motivation to sit down and post? nah. Anyway, thought I'd better update...
I'm 'successfully' part-time breastfeeding FR, whatever successful means. In this case it means she manages to do a poo every couple of days, and doesn't scream the ENTIRE time she's doing it, just a bit. It also means I'm obviously producing milk of some sort or other. Woo! Go me! But at what cost? Sanity. To be fair, my hideous moods may be also just a post-Christmas deflation of sorts. So anyways, these are all the things running through my mind:

* sewing - do some. One of my New Years Resolutions that I still vaguely believe in, is to Make. Every Week. Something anything. So I bought an actual sewing pattern for a top(but darned if I can't find the right fabric to match!!) which is slightly daring seeing as I haven't read a pattern in years, and now the back looks like gobbledygook. Interfacing? Yards? What? So that's one project up my sleeve, and another is to try and trouble-shoot all my cloth nappies. I made a huge batch last year while pregnant, and they LEAK! All around the legs, and I DID have the audacity to alter the pattern I was using, so I was asking for trouble. Anyhoo, I will attempt to add an extra couple of cms of elastin around the legs in each and every nappy. Not sure whether that will solve it, but hey, it's an idea.  Otherwise they are all useless.

* painting - must paint me some furniture. The paint, it calls to me. I have a wooden chair I sanded down a YEAR ago when I was painting like mad, and it's waiting in the corner, staring at me sullenly. So I've bought me some magenta spraypaint and I'm gonna spray that bee-atch! Woo!
* body image/weight. Expect to see a few posts on the issue of self-love and self-loathing. It's 'weighing' on my mind, har har har. I've spent the last year trying to cultivate a positive body image, looking at pictures of beautiful large women, and attempting to re-educate my poor little shattered brain that skinny does not equate beautiful. And yet, and yet. The first stirrings of my favourite black dog for the year, and I'm back to square one: hating on myself, longing to lose weight, pretending to want to 'just be healthy' when really my fevered mind is imagining how awesome it would be if I were actually gaunt. Yeah, my mind is so healthy right now! So I'm trying to re-re-educate myself. And/or starve myself. Just kidding. I think. Anyhow, how do all these plus-size women bloggers get so darned pretty? I would be happier about being fat if I didn't have such a large nose and bad skin, wouldn't I? We will explore these issues. I'm not afraid of going deeper into the dark to find what light there is. Noble huh?
* Tattoo addiction. I love 'em. I love getting them, I love looking at them, I love the stories behind them, heck I'd love to learn how to do them! So after much thought and discussion with my own navel, I'm going to say, if you love a thing and are passionate about a thing, do that thing. I am NOT afraid of what people will think about a nearly-30 yr old getting new tattoos and piercings. I'm not rebelling, I'm revealing more of who I really am.
* Homeschooling. Yep, it's a thing I'm interested in doing. For a multitude of reasons. Don't even start with your shouting at me. I know it would be a MASSIVE lifestyle change. But I just might be ready for it. 

All of these and more are just some of the juicy stuff I will be exploring this year, one step at a time. In the meantime, I am attempting to lift my mood. I'm not too afraid of telling y'all, I ain't well. But there's a plan. I have the nicest doctor in the world. Modern medicine is a marvel. I may be down, but I have hope. I'm not afraid that I'm falling into the pit. Yes I'm flailing a bit, but it'll be ok in a few weeks I trust. In the meantime, have patience with me. I may be mean, or weird, or moody, or just grumpy. Have patience with me. My mind is a little bit broke.
Love y'all.

Friday, December 21

Box City

Do you have shoeboxes lying around? I do. Confession: I hoard them. I had about 6 from the last two years from Josh and I. Grab those shoeboxes, and make something pretty:
wrap the box base and lid separately in brown paper - or patterned, whatever, it's your box.
you'll need to use a glue stick. I stole the kids ones. It worked better than sticky tape or pva.
once you've covered your box, jazz it up with all those scraps of ribbon you've been hoarding all year.  Use PVA  to  stick on some cute buttons - you know, all those spares you collect that come with your shirt? Yeah, who's laughing now!?

Now you have boxes to put your presents in. And if your gift-receiver has any common decency, they'll cherish the box the gift came in as much as the gift itself. Especially if the gift is just more handmade crap. 
There you go. You've got Christmas wrapped. Har har har. You're welcome!

Sunday, December 2

Weekend Joy

In my effort to be more bloggy(that's a word, right?) I'm starting a few different regulars, and one of them will be "Weekend Joy". Because I love the weekend, I love the chance to relax and do things that I may have been planning all week but never had the time to, and the chance to reflect on the week and the things I liked - or didn't like! I am often a Negative Nelly(that's a thing, right?), so I am going to try and focus on the GOOD bits. That doesn't mean my life is all rosy, and it's not meant to make you feel like crap if you didn't have a good week. I'm sorry if it was a crapper. Hugs. So here is my "Weekend Joy", a collection of favourite things from the last week. Enjoy.

* Loud Fist Sucking. Yes, it's a baby thing. It's like fist-bumping, but you do it to yourself, possibly also in a congratulatory appreciatory way. Like, yeah, I'm enjoying how awesome I am right now. The loudness is important, it has to be loud and proud.
* Triangles. This is my beautiful Cheek Pinchy ring. It's geometry gives me great joy. Apart from the triangle corners, which were always going to be pointy, it's super comfortable to wear, with a wide, flat adjustable band. It matches my awesome Cheek Pinchy earrings, which you can see in the next picture. I get so many comments on them! I'm wearing them almost every day. Cheek Pinchy's creator Kirsten is a dear friend of mine, and rather clever to boot. You can find her at all the good craft markets, in lots of shops, on Felt, and on Facebook. Yay Kirsten!
* My new gold shirt. Isn't it just? I got some vouchers for my birthday, yay! So I bought a few things that I wouldn't usually be able to afford. I don't think this shirt is actually made of gold, but it feels like it, comfy, soft and stretchy, and very shapeless, yay! Unfortunately it is hand-wash only, but I intend to wear it every day, so I just won't wash it. I won't be clean, but damn I'll be shiny! PS note my cute earrings?
 *Last but not least, my kiddies. It was really sunny and beautiful yesterday, and the two big kids romped through the yard, and then I got Maddy to hold Frida-Rose so I could put the tinsel up in the Pohutakawa tree. Ah, summer. Ah, Christmas. 
What are some great things you have done or had or bought or seen this week?

Ring those Christmas bells...

So the kids have decorated the tree, and I was getting a bit stressed about it, and then suddenly just gave up. It's Christmas, which is truly magical when you are a child, so the tree has been surrendered to them. It looks like a Christmas elf threw up on it. Ah well, it matches the messiness and chaos of the rest of the lounge. But, I had to do something pretty, so I made a Merry Christmas garland. Super easy, unless, like myself, you packed all your sewing things up in a hurry a few months ago, and now can't find your pins. Where are they?? No seriously, where are my pins? Anyways, here is the finished product:
* I drew the letters free-hand on white polar-fleece(an absolute pain, you should use something stiffer like felt), and cut them out. I realised mid-cutting that I should have drawn them on BACKWARDS, or drawn the letters on card first, cut out the card, flipped them over and traced them onto the fabric. Sigh. Obvious to everyone but me! So mine have orange felt-tip edging. I totally wanted THAT to happen.

* Then I cut(freehand again, because I am a LAZY crafter) triangles out of felt, all roughly the same size, and glued the letters on using PVA. Again, this would have been way easier if the letters had been felt, but as it was they flopped around all over my hands and the whole exercise was truly messy. All of this took about two hours. I know, right? But you will be quicker, you will learn from my mistakes. I am here to help. Also, to be fair, I was simultaneously watching Die Hard 2. The airplane one. It's the best, IMHO.

*When the letters were completely dry(or, the next day, whichever comes first), I arranged them under some ribbon, slightly overlapping, and pegged them into place. Yes, you read that right, pegged them. Where are those freaking pins?! I chose a wide heavy ribbon, to support the weight of the felt triangles, I think a satin or cotton ribbon would have flopped out a bit when hung on the wall. This ribbon is embroidered, isn't it rather lovely? And then I sewed those babies on. Using whatever colour thread was in the Husky, thankfully it turned out to be white.

I sewed the 'Merry' and the 'Christmas' on two different pieces of ribbon, I thought one long arrangement would be too long and heavy, and also it gives more flexibility to hang in different places. My lettering turned out quite nice(if only it didn't have orange colouring-in round the edges!!), the 'm's and the 'h' were a little big, but I glued them to fit inside the triangle, and it ended up looking like a Dr Seuss font. Accidental coolness!
This wee project didn't take long, I'd love to do a 'Happy Birthday' garland as well, along with a garland of each person in the family's name. Then their names can hang over their beds during the year and then be whipped out when it's birthday time! Celebration!

What crafty things have you been up to? I'd love to hear your ideas. xx


Saturday, September 1

To market, to market...

        Well, tomorrow is the Devonport Craft Market, and I'm super pysched about it, aren't you? Lots of my favourite crafters will be there, and it's always a really busy fun time... as a customer that is, I've never been a seller there before! Woot! I've got some new crafty bits that'll be there, in response to feedback from Crafternoon Tea the other week; as well as lots of positive love for my softies etc, I had lots of people commenting on the necklace and earrings I was wearing, which I used to make more of but had kinda eased back on.... well if the people want more jewellery, the people shall get more jewellery! The customers have spoken! :) See, I do listen....
I love this little jug so much, seriously. 

All these lovely little ear droplets will be between $5 and $10 - total bargain!!

           I love these new button necklaces, the buttons sit really well on your décolletage(if you have one), and I LOVE the orange chain... I got it at a market in the Gold Coast, and I only got a metre of it!! What was I thinking! I've never seen any like it in NZ. Sigh. So there are two special necklaces, a button and a heart, with saucy orange links... All my necklaces will be between $10 and $20 - spare change really!

            The other thing I'm excited about is that My Lovely Husband will be my market buddy! Yay! He's the funnest person I can think of to have along, but usually he has to stay home and look after the kids, so this time we got a babysitter! He looks like this:
        Doesn't he just look lovely? :) Yay Josh! 

     Together we're hopefully going to bake up a storm this afternoon(he's the best baker/business analyst EVER!), so we won't be tempted to buy lots of food tomorrow - hah!
         So come along tomorrow to the Devonport Craft Market, Devonport is such a lovely spot to hang out and eat some yummy ricotta pancakes at Mecca, go have a wander on the wharf and then pop in to Clarence House for some local handmade awesome. See you there!