
So. I've done it again. I've cut my own hair - and it looks great! In my humble opinion that is... I know I'm going to get lots of funny looks, and I'm going to be fielding lots of questions. I have faith that most of the people who I bump into in the next wee while are used to me and my crazy ways; they'll say it looks fantastic, even if they don't think it. Which is what matters in a friendship(by all means advise a friend against cutting her hair if you need to, before the fact, but after the fact, remember it always looks gorgeous...).
I know lots of people will again be amazed by the fact that a) I thought I could cut my own hair, b) I had the guts to actually do it, and c) that it turned out how I wanted it to. So I thought I'd give you the lowdown on cutting your own hair, because it really is an easy skill to master(not saying hairdressers aren't skilled, because they mostly are), and it will save you oodles of money, and it feels totally liberating and empowering.
Here's the key:
oh I'm soooo funny!! Cracking myself up right now....
Your Hair Will Grow Back!!!
That's right friends, the key to being confident enough to cut your own hair, is knowing that truth. The sun will rise, and the sun will set. Your hair will grow back.
Alrighty, armed with that knowledge, you can start your journey to hair happiness by following these steps.
1) The Three R's: Research, Research and Research
Think about it first - that goes without saying. I thought about this particular hairstyle for a YEAR beforehand, but that is unusually forethought-y of me, usually it takes me a couple of weeks to decide what I want to do. Remember, it will grow back. Go on Pinterest(like, now!) and make yourself a profile - if you haven't do it, do it please now!!! You may not know what kind of hairstyle you want, or you may know what it looks like but not the actual name of it. Start by a broad, generalised search, like 'layered hair' or 'short hair' or 'bangs'. Make yourself a 'Hair' board, and start pinning stuff you like. You'll figure out what to search for once you know what kind of style it's named. Does that make sense? I have two hair 'boards', one for long hairstyles, and one for short hairstyles. Basically the long hairstyle one is to inspire me to keep growing my hair(it's taken 18 months to get this long from a pixie cut), and it serves as a test as to whether I really want to cut my hair. And the short hairstyle one is for inspiration and fun! When you are looking for pictures to inspire you, or when you are narrowing down your search, keep the following in mind:
- Face Shape/Body Shape: Be honest about your face shape. Look closely at the pictures you love... is your face heart-shaped and the models face oval? Is your face rounder? Try and find pictures of people with the haircut you want, that have a similar shaped face to you, or even better, someone who looks about the same weight as you! This will make a big difference to how the haircut turns out.
- Angles: See if you can find pictures of different angles of the same or similar haircuts. It's all very well to know what you want the front of your head to look like, but you need to know what the back will look like t0o! Also side-views are helpful; how will the hairstyle look around your ears, face, jawline, neck... If you're going to cut your own hair, you need to know all the different angles.
- Growth Pattern: Include pictures that are similar to how you want your hair cut, but longer. You need to know how it's going to look as it's growing out. I always leave my hair to grow at least 2 or 3 months in between cuts, mostly out of pure laziness, and I like to know how it's going to change as it grows.

Some of the pics that are inspiring me
2) Youtube:
Pretty self-explanatory. If you are nervous or uncertain of how to go about cutting hair, look for a video or two on Youtube. I didn't this time round, because what I wanted to do was pretty simple and I've done versions of it before. But I found it really helpful when I was wanting to cut my fringe in the Betty Boop(or Betty Page) style of short, blunt bangs, to watch a few videos - several times - that showed how to cut your own fringe. I searched specifically for 'Betty Boop bangs', so again it's helpful to know what sort of name to give the style you want. You may search seperately for 'soft, feathered fringe' and 'long layers' so that you can put together several different angles.
3) Pin Trial:
Armed with a wall mirror and hand mirror, and a bunch of bobby pins, PIN your hair into something closely resembling the style you want. Curl it up underneath, use rollers, whatever - have several redoes until it looks right. Wear it around the house for a few hours, and catch sight of yourself in the windows and mirrors around the place. See if your kids even notice!! If it looks ok, wear it out to the mall, coffee-group, anywhere. Get used to it. Same philosophy as putting up images of that tattoo you want to get all over the house: get used to it, and decide before it's too late if it's what you want. If it's not quite right, adjust it. It can be helpful to take pictures of your hair pinned up this way, to guide you when you start to cut.
4) Choose your day - and begin!
Choose a good day and time to do it - when the kids are in bed(otherwise they'll get ideas!) and book it into your diary, just as you would a regular haircut. Don't let it get squeezed out! Make sure you have all the tools you need. I usually have:
- small haircutting scissors($2 shop or Kmart)
- fine tooth comb
- bobby pins or banana-style hair clips
- hair razor if needed
- towel or old shirt - just like dying, a button-down one is best, so that you can gingerly peel it off at the end without pulling a back-load of hair over your neck and face!
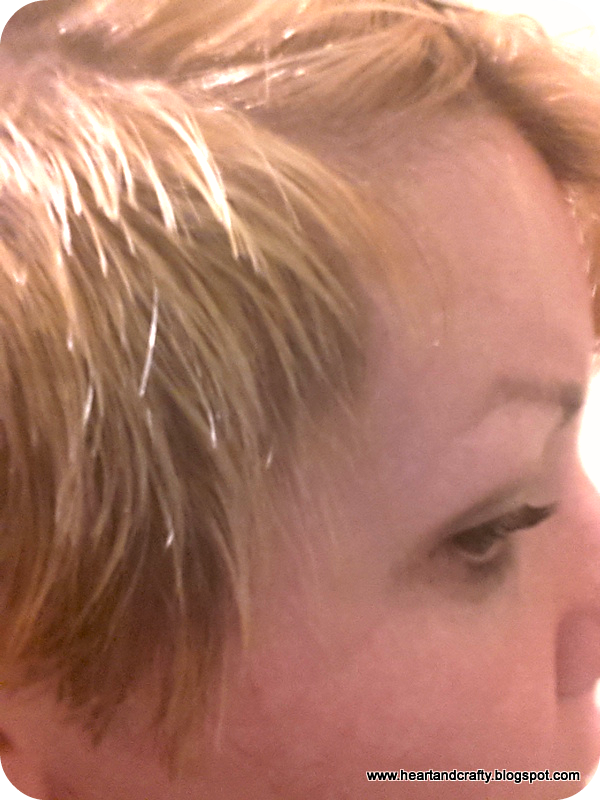
DON'T have a glass of wine first... always cut sober, friends! You can cut your hair wet or dry... I usually do mine dry - and not super clean either. It doesn't matter in my experience. Wet hair is harder to clean up afterwards though! Start combing your hair into small, horizontal sections. The nape of your neck is usually a good starting point. Now - I'm not going to go into the nitty gritty here, so for more detail, go to Youtube! I'll explain what I did for my 'undercut'(short-sided) haircut here, but I doubt that it's what any of you folks are pining for! :)

My hair is in bits!
First I sectioned off the part of my hair that I wanted to cut, and using my fine tooth comb I parted my hair... checking several times with the hand mirror, and the husband, and finally even took a couple of photos of the back of my head with my phone - so handy! I wanted the part to be straight but curved with the shape of my head.
Mmmm... look at that greasy hair...
First cut: Always cut at least an inch LONGER than you want your hair to be - by the time you have straightened and trimmed all the edges several times, it will be short enough, trust me. Here, although I wanted to actually shave the partioned side of my hair, I cut it first - as neatly and evenly as possible. When I'm cutting my hair this short I always hold the scissors vertical - in line with the side of my head. I divide my hair into thin vertical sections using the comb, then pull it out from my head with my fingers and cut up vertically on the outside of my fingers, keeping the scissors right up close to my fingers. When my hair is super short and I'm trying to even things out, I do sometimes cut on the inside of my fingers... if that makes any kind of sense...

Shaved
Second cut: This haircut was quick because I was only doing one section of my head, but shaving with a razor is definitely a fast way to go! It was quite tricky doing the bit at the top and back, along the parting - I hollered for my poor husband to help, but he was useless! Sorry darling! I was a bit scared about going over the parting, but soon realised it wouldn't actually shave those longer bits that were all carefully pinned down - phew! During the whole process I kept putting down the scissors or razor and checking with the mirror and my phone again. I would spot the areas that needed to be evened out, put my hand up on that part of my head and then put down the mirror/phone and get the scissors out again. You really learn to feel your hair, feel the length of it in relation to the thickness of your fingers... I almost reckon I could cut blindfolded by now! Almost....

Final check-a-roony!
Last step: Smile!!! You look great! Tell yourself that, over and over again!

Adding some doodly love-hearts definitely helps!
5) Aftercare:
Ok, so not really care of your hair afterwards, but caring for yourself. Your reflection may look odd.. you may not look like yourself any more. It will take some time to get used to the new you. You'll forget when you wake up - go to the bathroom - and ahhhh!!! Who is that? Something that I always try to do when I go out for the first time is really fix myself up nice. You're going to be feeling slightly timid and self-conscious, your friends are going to exclaim, you'll catch sight of some of those nasty shop-window-angles... so dress up! Put make-up on, put your pearls on, wear clothes that are flattering and familiar to you, that you KNOW make you look and feel great. First impressions count - even to yourself about yourself! So make sure you're feeling good when you leave the house with your new do. Put your shoulders back. Smile. Put Adele on in your car so that you can sing as loud as possible! Practice the art of self-confidence.
4 comments:
OMG that is so you
I love it
You are bold and daring and rocking it!
Great Job! I LOVE it!
Hi buddy,
Thanks so much for posting this! I have fine straight hair (also thick with body) that I like to keep right above shoulder length in a messy bob. This was the easiest to follow “cut your own hair” tutorial I could find, and it garnered great results!
Post a Comment